How to use Cloudflare R2 with Ruby on Rails Active Storage
Topics
Introduction
File upload is one of the most common features in applications, not only in web applications but also in other platforms. For instance, a user is able to upload an avatar profile and a team owner can upload a logo. In web applications, there are three common approaches:
- Local file system: Store the uploaded files directly on the file system of the host. This is commonly used in the development stage, storing in file system is simple to implement but it may not scale well and does not recommend in production.
- Database: Did you know that you can store files in a database as binary? This approach can simplify the management files as they are stored with the rest of the applications’ data. While this approach is simple, but it comes with the downside that it can increase database size very quickly and will impact the performance of the database.
- Object Storage: In the production environment, cloud object service such as Amazon S3, Azure Blob Storage, and Cloudflare R2 is very common. This approach provides scalability, durability, and flexibility as it offers access from everywhere. It can be more cost effective and offers features like data redundancy and CDN integration.
The choice of storage strategy depends on several factors such as volume of files, performance requirements, cost consideration, and more. As a developer, it’s important to evaluate the trade-off of each strategy and select the best suit for your application.
In this post, we will go through object storage and use Cloudflare R2 for the service.
What is Cloudflare R2?
R2 is an object storage service from Cloudflare that offers Zero egress fee and the freedom to create multi-cloud architectures.
What does Zero egress fee mean? Simply put, it means you don't have to pay when you access your data.
What makes Cloudflare R2 more exciting is its S3-compatible API. Amazon S3 is the most popular object storage service, as it offers Amazon's architecture and effective pricing. If you plan to migrate from Amazon S3 to Cloudflare R2, you can simply change the configuration. Here are the key features of Cloudflare R2:
- Globally distributed
- S3-compatible API
- Zero egress fee
- Integration with Cloudflare’s CDN
- In-workers API
- Integration with Workers
R2 is charged based on the total volume of data stored. There are two classes of operation on the data:
- Class A operations: more expensive and tend to mutate the data
- Class B operations: cheaper and tend to read existing data
R2 also offers a FREE plan with 10 GB / month, here are the details per this article posted. With only a Free plan you can give it a try in your next project.

In this post, we will be focusing on how to use R2 with Ruby on Rails Active Storage.
Build application
We will build a simple application where the users can crete post and upload the image. Note that we will not set up the authentication to simplify this post.
Open your terminal and let's create a Rails app without a test
rails new rails-cloudflare -T
Now we will set up Active Storage, install image_processing gem for image analysis and transformations by open Gemfile and uncomment the line image_processing and run bundle install
- # gem "image_processing", "~> 1.2"
+ gem "image_processing", "~> 1.2"
Now it’s time to install Active Storage, run the following command to copy database migration into application
bin/rails active_storage:install
then migrate the database
bin/rails db:migrate
Now, Active Storage is active and ready to use. You can check the service options in config/storage.yml. The default service is local as you can see in config/environments/development.rb
# Store uploaded files on the local file system (see config/storage.yml for options).
config.active_storage.service = :local
It’s time to setup R2, first register to Cloudflare if you don’t have an account. Then, in the dashboard click the R2 menu. Copy the Account ID and save it, we will use it later
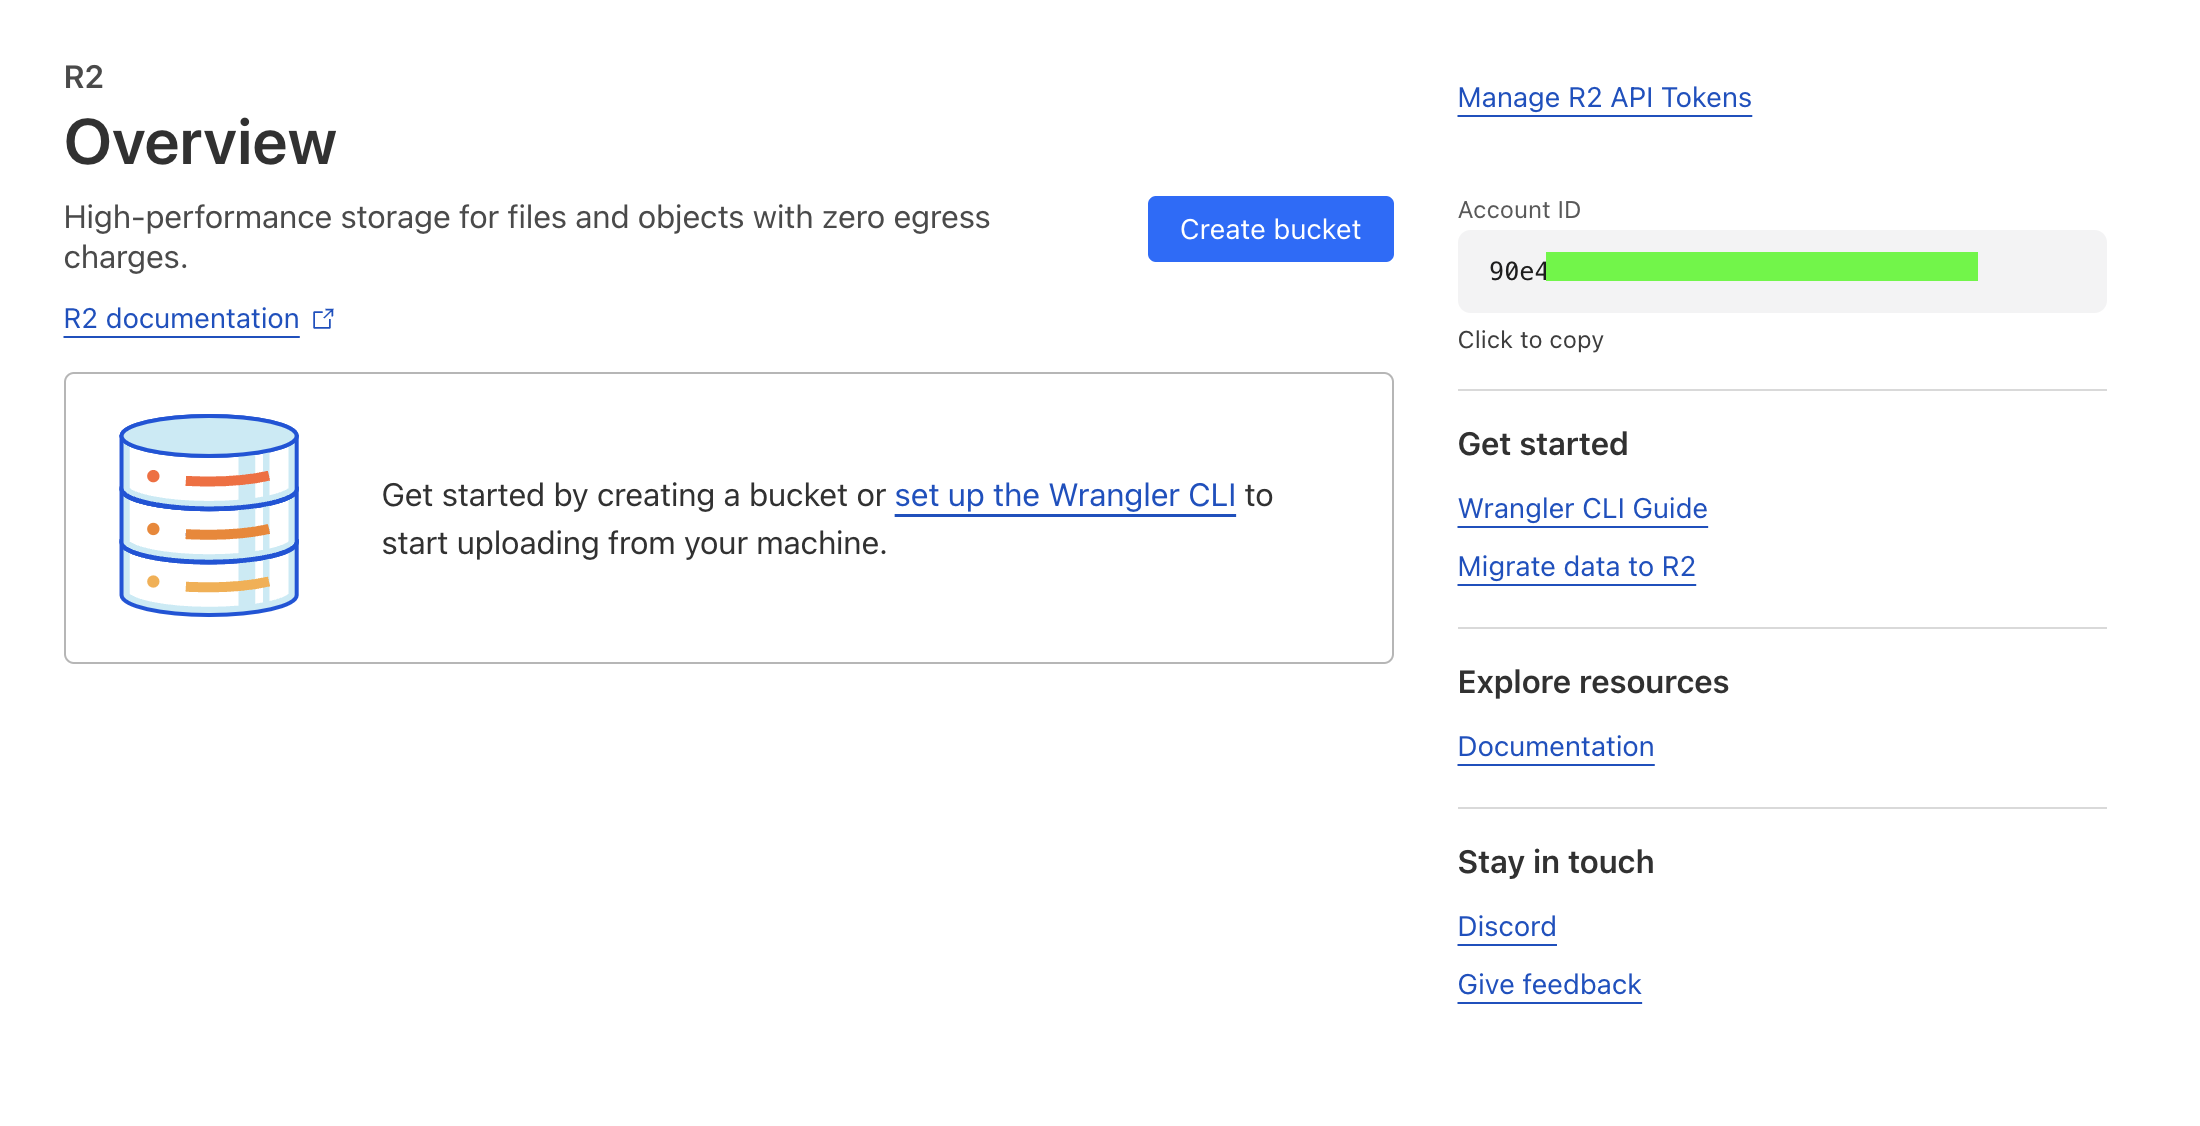
Click Create bucket, enter the bucket name and leave the Location is automatic. Then create Create bucket to save it.
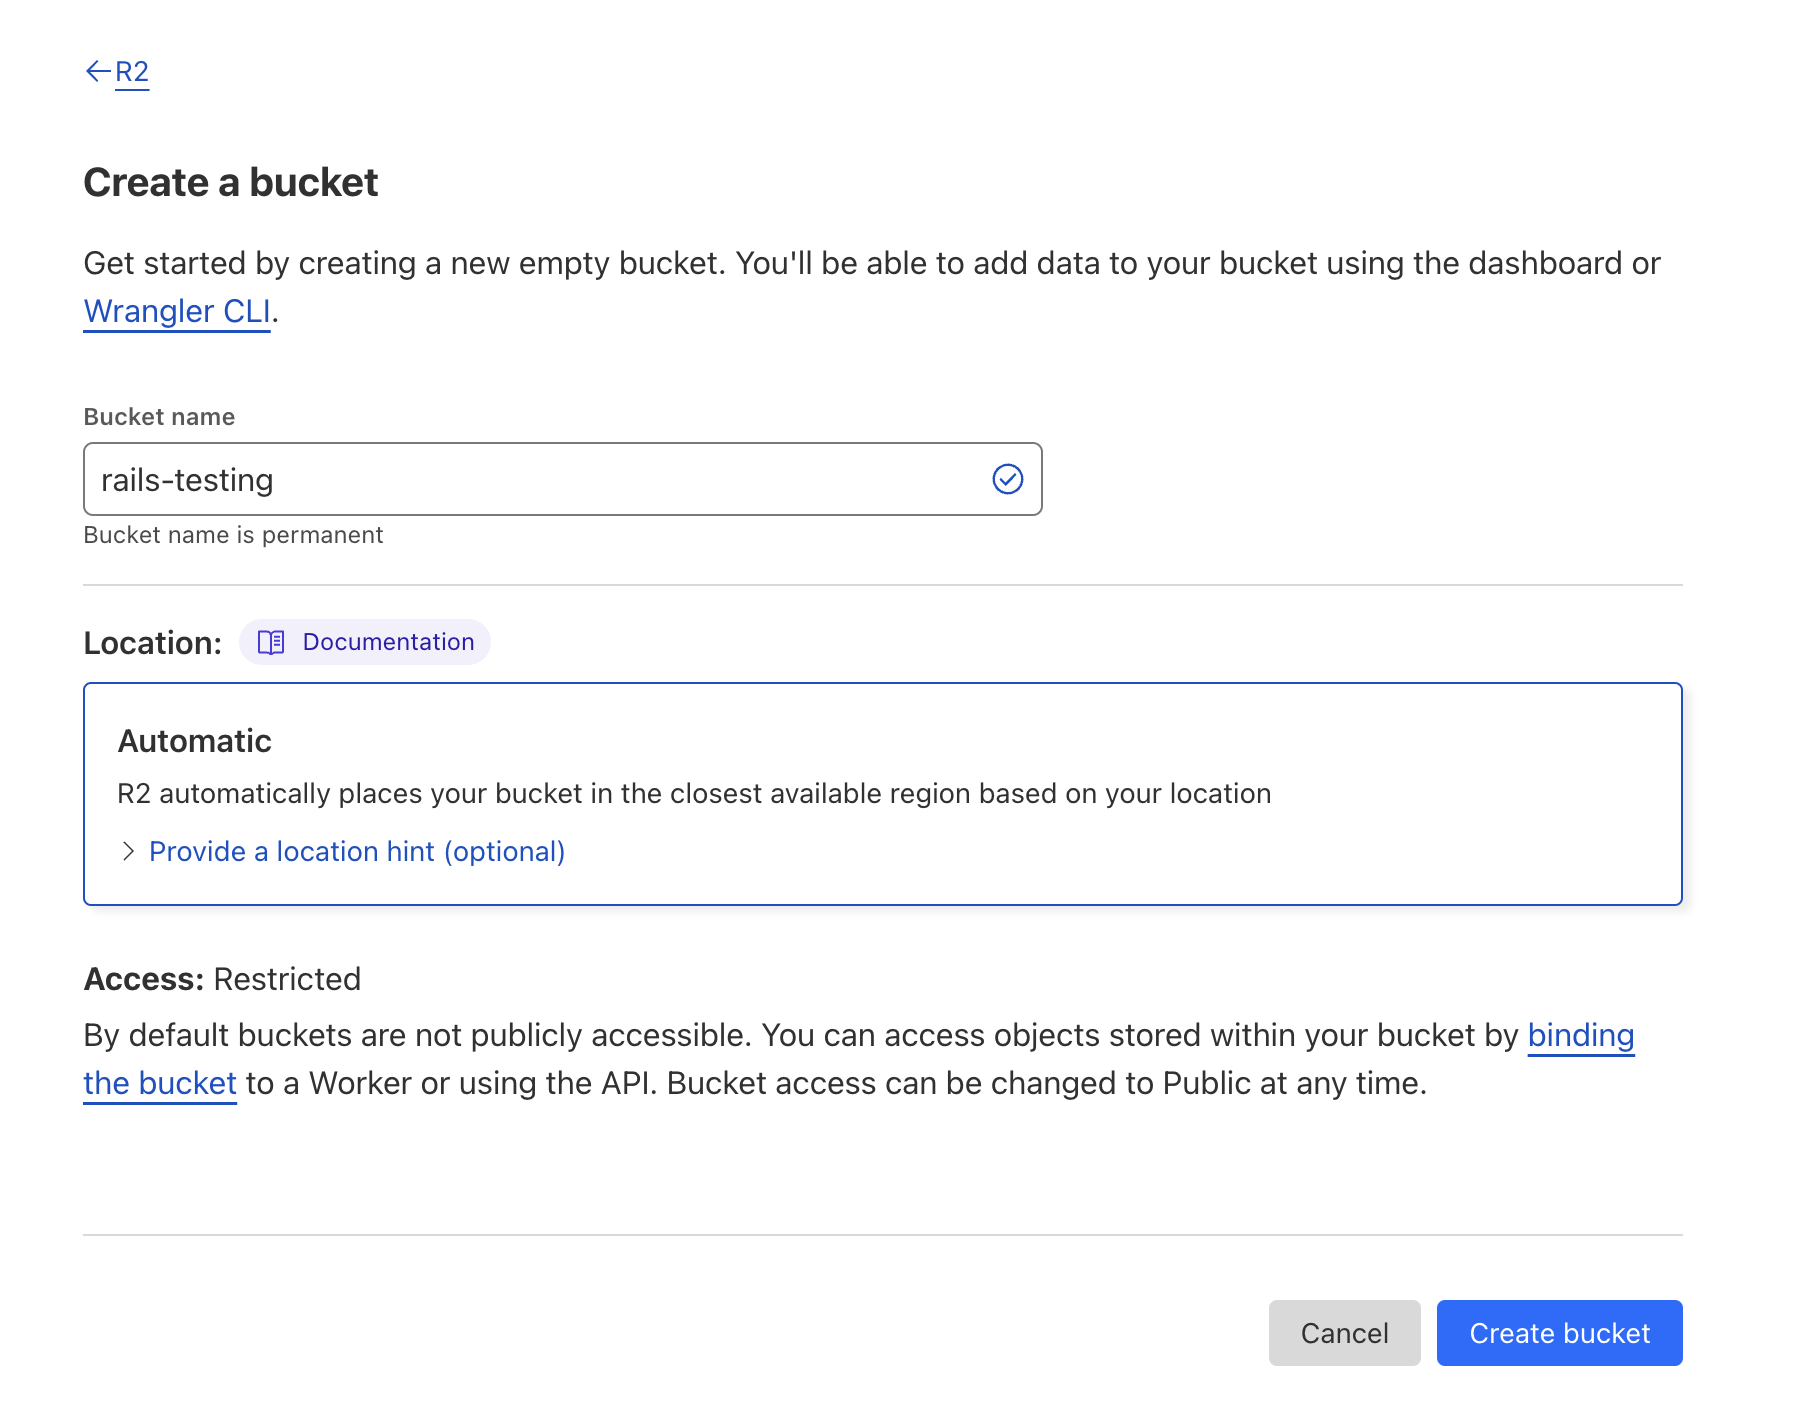
And now you have successfully create R2 bucket. Let’s create R2 API Tokens. Back to R2 Overview and click Manage R2 API Tokens. This tokens will give you an access to the bucket and authenticate your service.
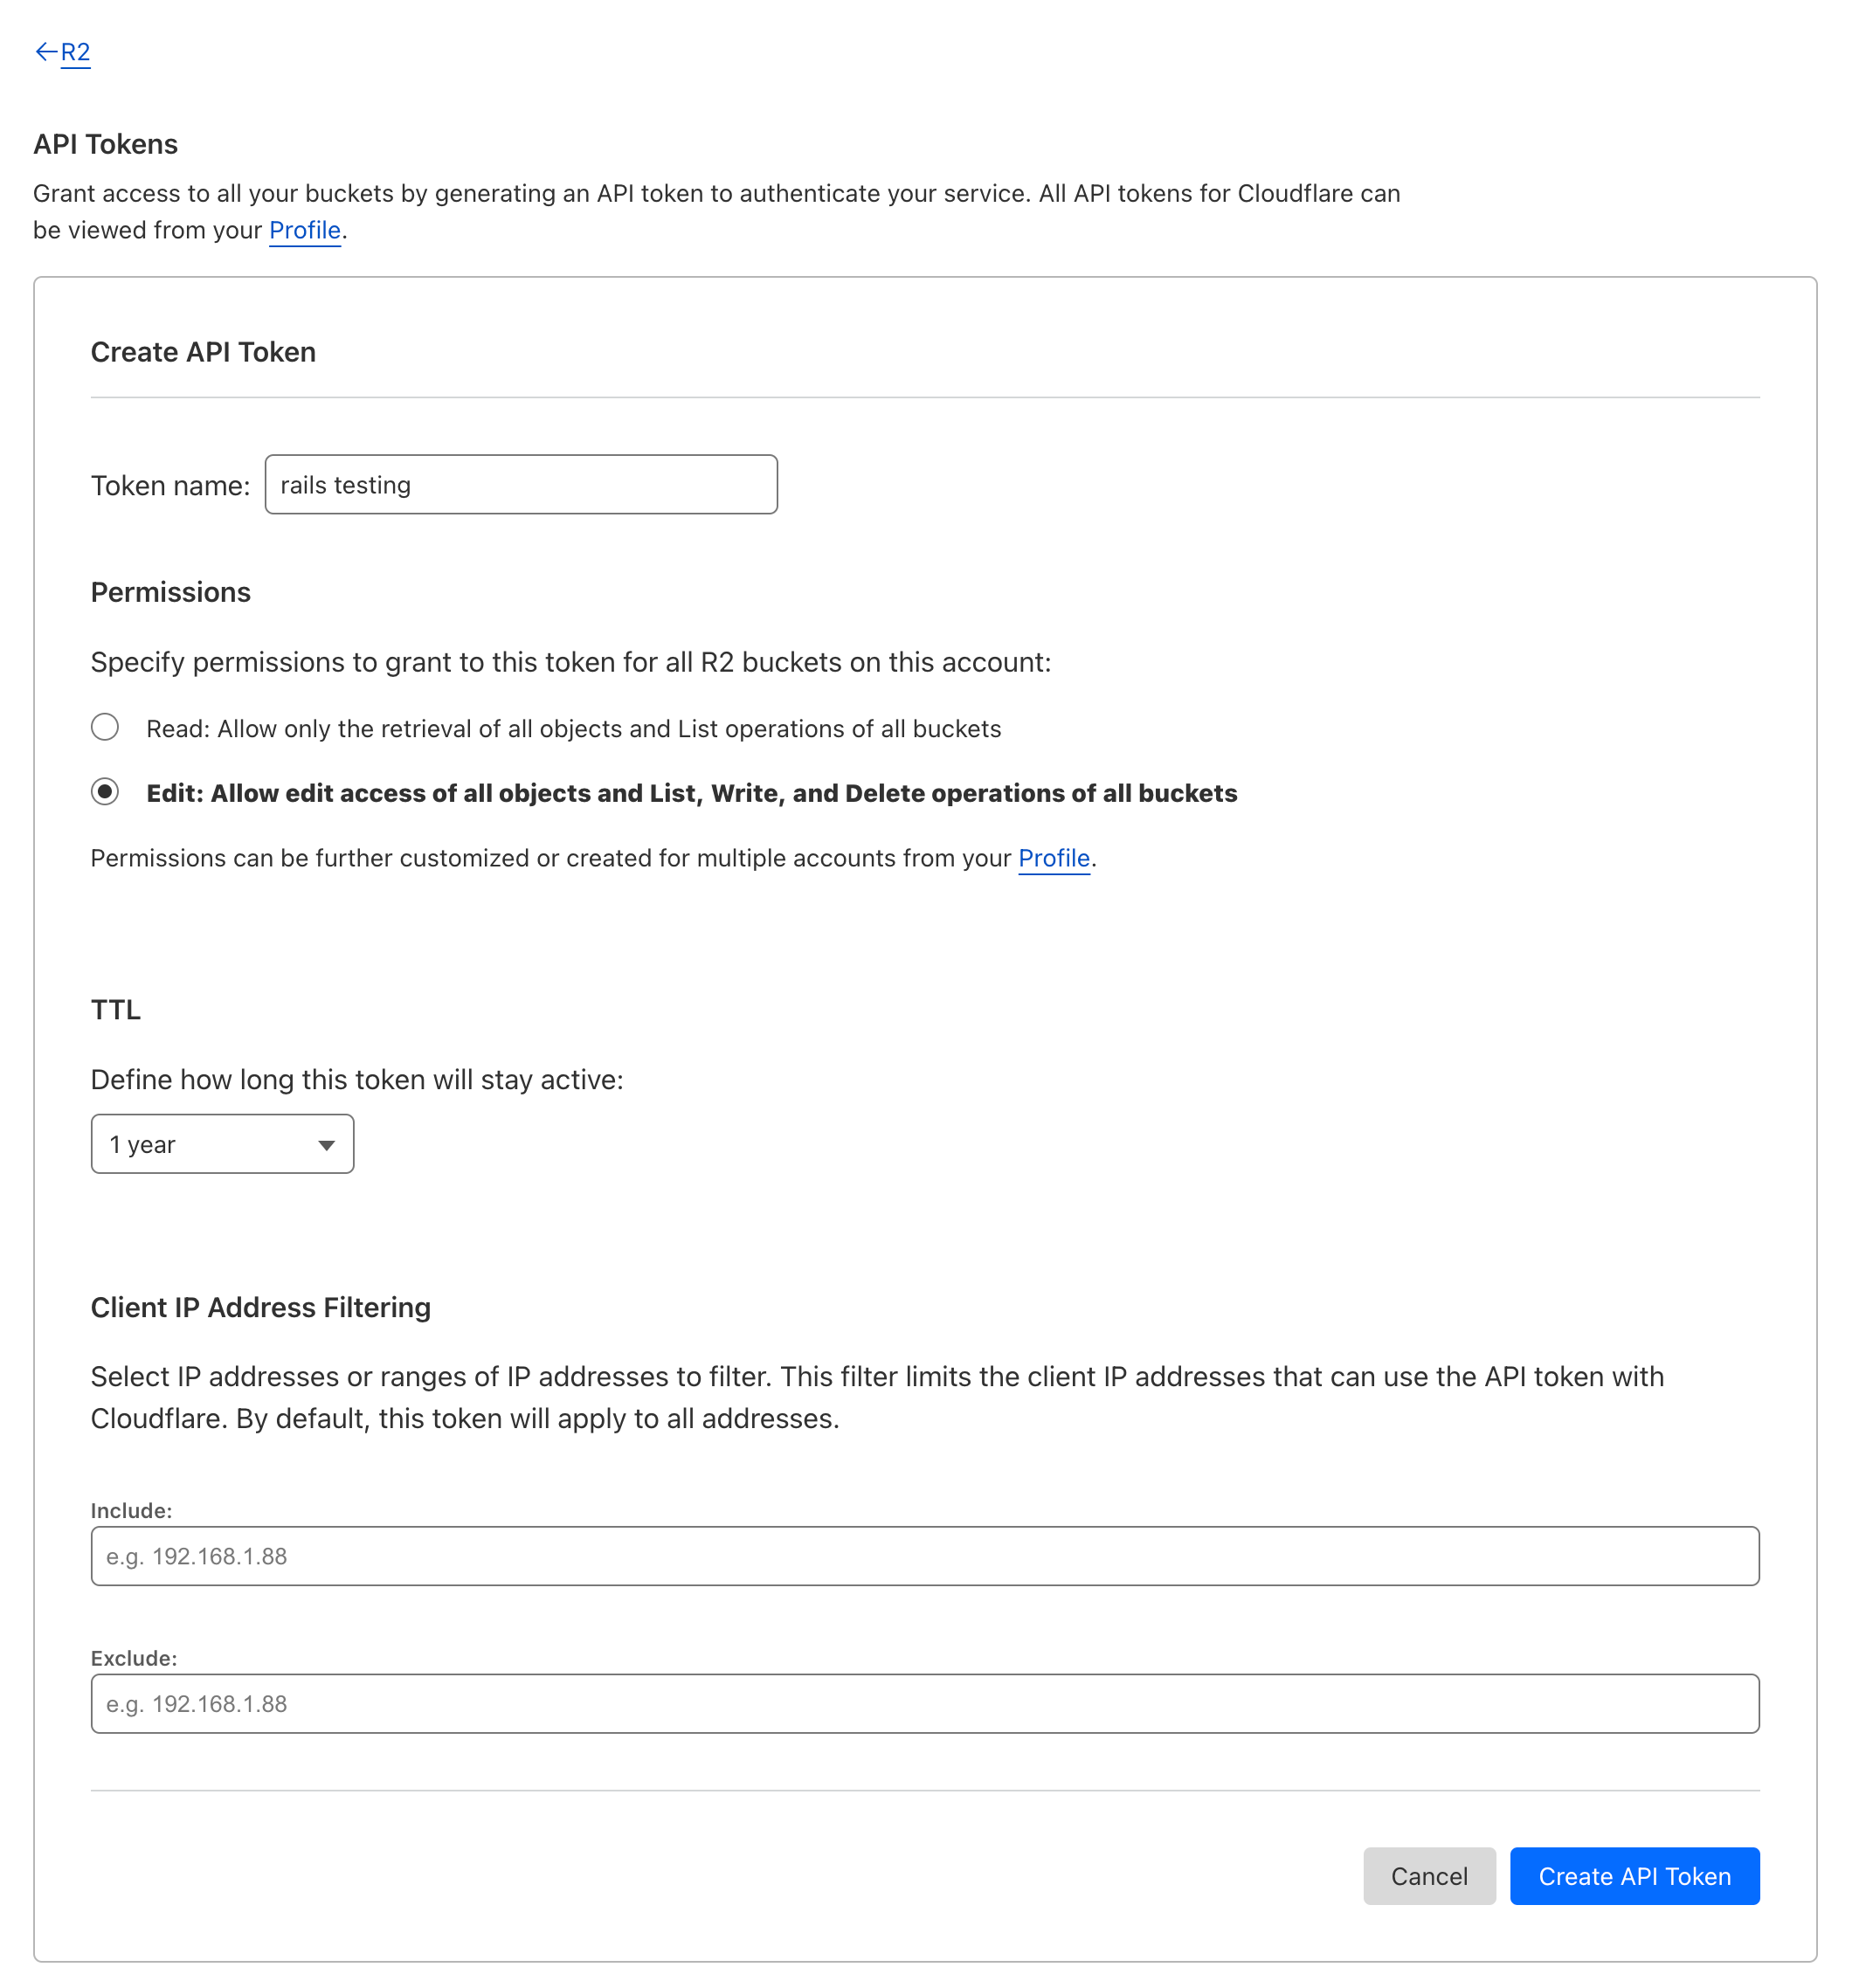
- Enter the token name that represent the bucket, this will help you to identify.
- Choose Edit for the permissions as we will upload the file, not only read it
- Select TTL, for this case I select the token will be valid for 1 year
Click Create API Token , you will be redirected to the page that shows the Access Key ID and Secret Access Key. Don’t forget to copy and save them in secure place as this will not be shown again.
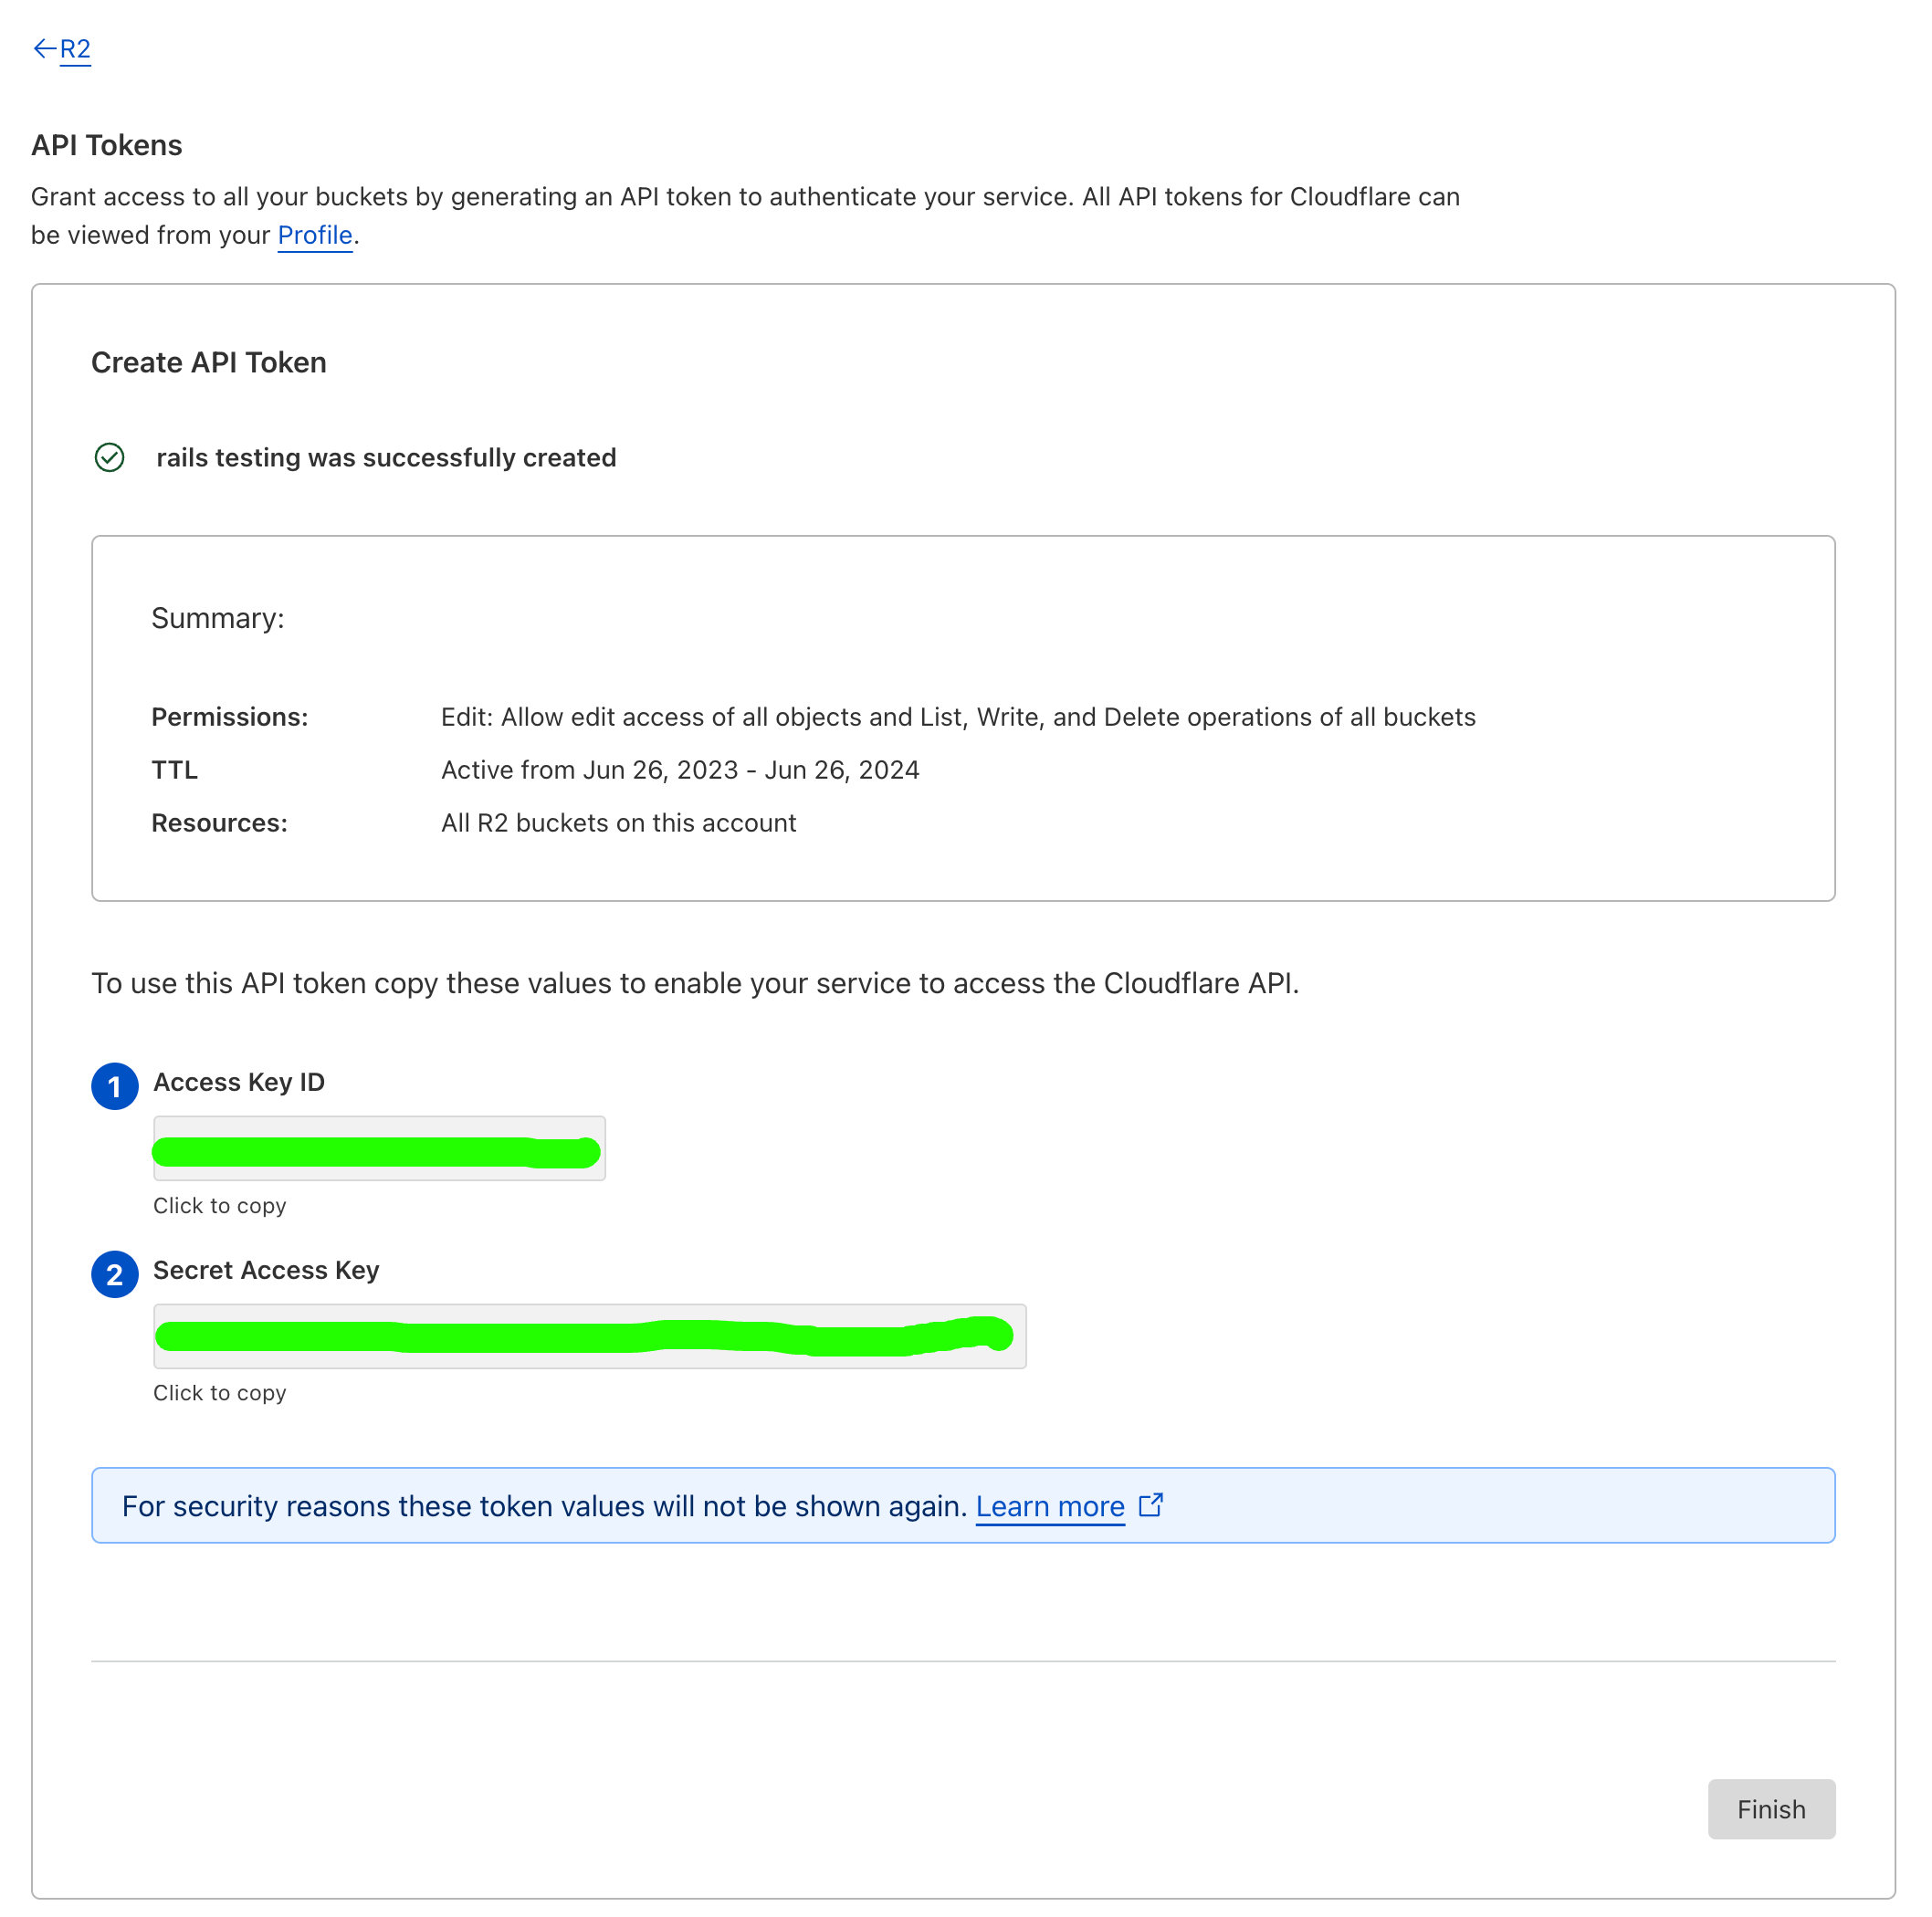
Now you have Bucket and API Tokens, it’s time to use it in the code. Open config/storage.yml and add new service named cloudflare
cloudflare:
  service: S3
  endpoint: https://<%= Rails.application.credentials.dig(:cloudflare, :account_id) %>.r2.cloudflarestorage.com
  access_key_id: <%= Rails.application.credentials.dig(:cloudflare, :access_key_id) %>
  secret_access_key: <%= Rails.application.credentials.dig(:cloudflare, :secret_access_key) %>
  region: auto
  bucket: <%= Rails.application.credentials.dig(:cloudflare, :bucket) %>
We are using Rails Credentials to save the sensitive information under cloudflare key. Note that the service is S3 because we will using S3 SDK for Ruby, remember that Cloudflare R2 is S3-compatible API.
Tired of the endless server configuration headaches? WrappedBy takes care of it all for you. Say goodbye to manual setup and hello to hassle-free deployment. Discover the ease of deploying Ruby apps with WrappedBy and revolutionize your development process. Start deploying with WrappedBy
Because we will use R2 in development, edit the Rails Credentials for development by running
rails credentials:edit --environment development
it will open your editor, normally is vim and then add this code. Replace the value with your own information that you setup earlier.
cloudflare:
  account_id: your_account_id
  access_key_id: your_access_key_id
  secret_access_key: your_secret_access_key
  bucket: your_bucket
Open Gemfile and add aws-sdk-s3 gem and then run bundle install
gem "aws-sdk-s3", "~> 1.122", require: falseYou have successfully create cloudflare service, now it’s time to use it in development environment. Open config/environments/development.rb and change this code
- config.active_storage.service = :local
+ config.active_storage.service = :cloudflare
By doing this, every file uploaded in development environment will go through in your R2 account.
Now create a simple resource called Post with image on it.
bin/rails generate scaffold Post title:string image:attachment
If you open app/models/post.rb you will see that the Post has one image relation.
class Post < ApplicationRecord
  has_one_attached :image
end
Open your terminal and migrate the database by running rails db:migrate. We can try it now, start the server rails s and open http://localhost:3000/posts. Click New post and enter Title and Image and then save it.
Now, go back to Cloudflare dashboard and check in the bucket, you will see new object has been added. You can also check in your app by open the latest post, which will redirected to post details. Then, click the image link, you will see that the app will redirect to cloudflare domain which is https://<bucket_name>.<account_id>.r2.cloudflarestorage.com/
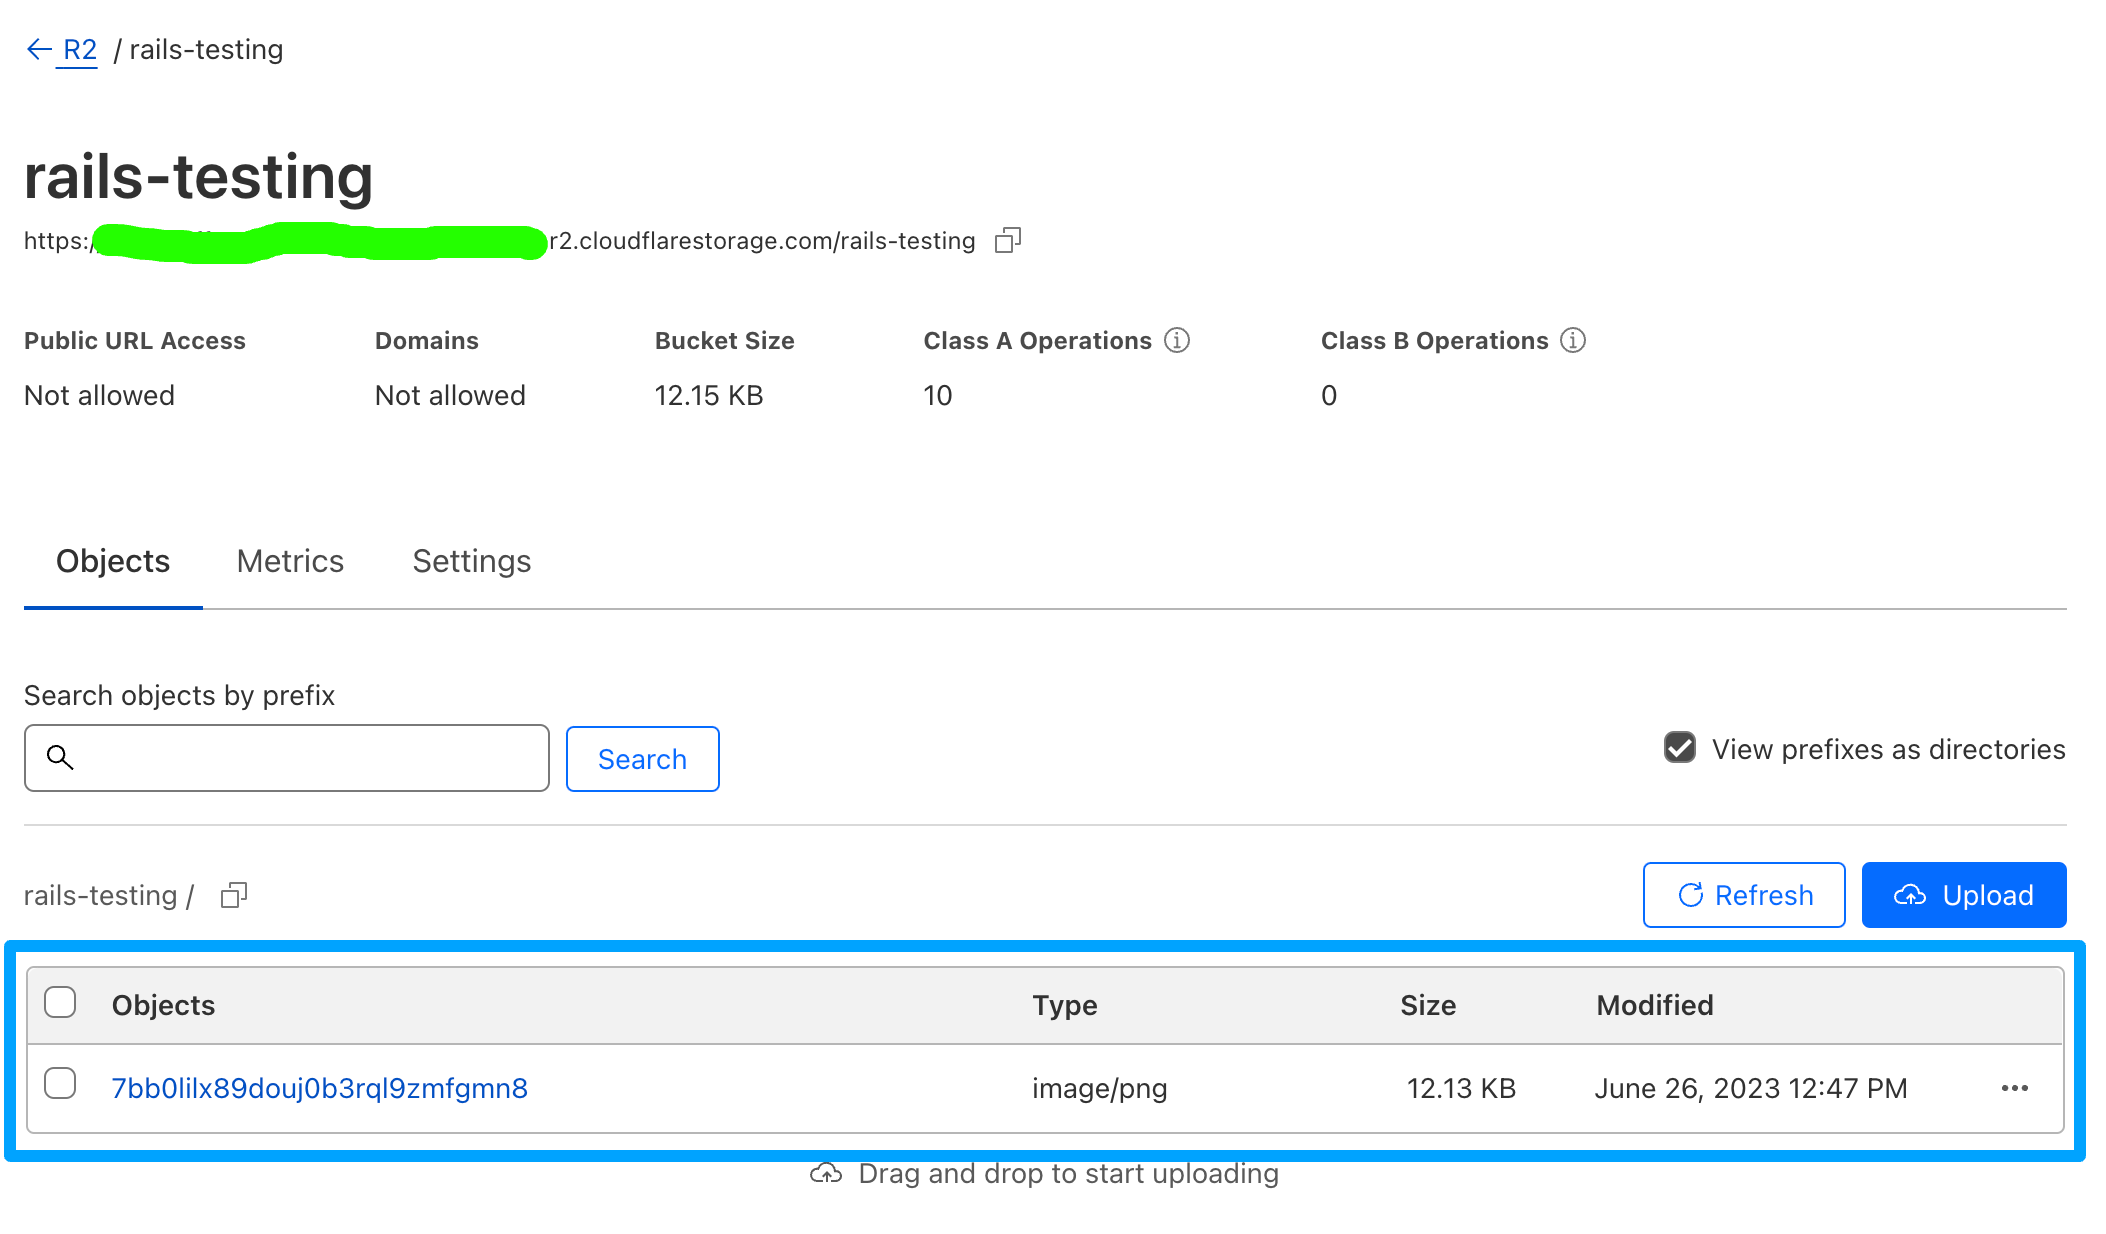
Congratulations! 🎉 Now your application is using Cloudflare R2 now for the object storage which offers zero egress fee.
Bonus
In some case, you may need to allow the user to upload the file in the text editor like Trix editor. However, you current configuration not allowed it, you need to configure the CORS. Here the configuration
Open the Cloudflare dashboard and click the bucket, in the bucket details click the Settings. Scroll down util you found the CORS Policy section and then click Add CORS policy
Add this code and replace the domain origins with your domain.
[
  {
    "AllowedHeaders": [
      "*"
    ],
    "AllowedMethods": [
      "PUT"
    ],
    "AllowedOrigins": [
      "https://www.example.com"
    ],
    "ExposeHeaders": [
      "Origin",
      "Content-Type",
      "Content-MD5",
      "Content-Disposition"
    ],
    "MaxAgeSeconds": 3600
  }
]
Now your users can upload the file from the client side or normally called direct uploads.
Conclusion
Using object storage can help you to not deal with infrastructure problems and durability issues as it is already handled by the service provider. While R2 may offer flexible pricing, as a developer, you may need to consider using caching strategies to further reduce costs.
I have been using Cloudflare R2 in my recent projects, and overall my experience has been good. I appreciate the simplicity, performance, and pricing.
Download the source code https://github.com/daily-newer/rails-cloudflare-r2
Ever wished deploying Ruby on Rails apps could be as easy as a few clicks? 🚀 Curious about a platform that promises to simplify the entire process? Well, your curiosity is about to pay off! Introducing WrappedBy, your ultimate destination for lightning-fast Ruby application deployment right onto your very own server. Check out our YouTube video here: